🔍 TL;DR:
This article outlines how to set up and benefit from SAML authentication in Veeam Backup & Replication v13 by:
🔐 Offloading authentication to Entra ID, Okta, Auth0 and other providers
⚡ Exchanging XML metadata between VBR and your identity provider for quick setup
✅ Standardising on SAML support as a baseline feature, with no extra cost
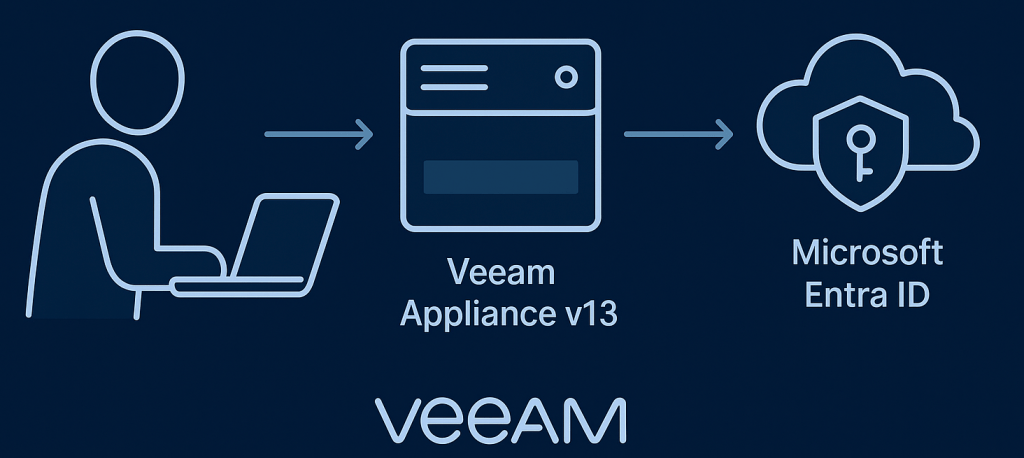
One of the new features introduced in Veeam Backup & Replication v13 is support for SAML authentication for the backup console. This allows you to offload authentication to a trusted third party identity provider like Entra ID, Okta, Auth0 and others. In doing so you can simplify user management, improve security and align your Veeam deployment with your existing identity strategy.
Entra ID is the most common choice and one that many organisations already have in place, but the important point is that Veeam hasn’t locked you into a single platform. Any identity provider that supports SAML can be integrated which gives you plenty of flexibility when choosing or standardising on an IdP.
Veeam’s offering of SAML support is as standard and doesn’t require any type of premium/enterprise license however I was recently made aware of this running list on sso.tax that highlights vendors who still try to put features like SAML behind a higher licensing tier, which is absolutely crazy! In reality, there’s no reason to treat SAML as anything more exotic than LDAP/Active Directory. If you’re evaluating solutions, be sure to look for those that include SAML at no extra cost since it should be considered as the baseline for modern authentication.
The best part is that the setup in Veeam is straightforward. At a high level it’s just a two step exchange of metadata files:
- Upload the XML metadata from your VBR server into your identity provider
- Take the XML generated by your identity provider and upload it back into VBR
- Assign users & configure RBAC using your external identity source
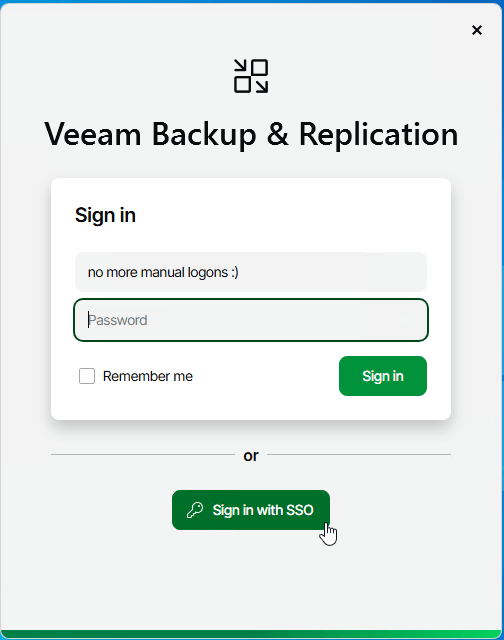
That’s it, once the trust is established, you can use single sign on to access the Veeam console with the same identity you use for other business applications.
In this post I cover off how to configure SAML authentication with Entra ID, since that’s the most common scenario I’ve come across in the field so far and haven’t seen this documented in the community yet.
Step 1 – Create a new Enterprise Application
- Log in at https://portal.azure.com with an admin account which has permissions to create Enterprise Applications.
- In the sidebar, Navigate to Micrsoft Entra ID > Enterprise applications and select + New application
- Click Create your own application at the top left of the screen and give your application a name so you can identify it (for example Veeam13SAMLApp)
- Select the checkbox to Integrate any other application you don’t find in the gallery (non-gallery) and click Create
- Under Single Sign On, Select a Single Sign On Method, click SAML.

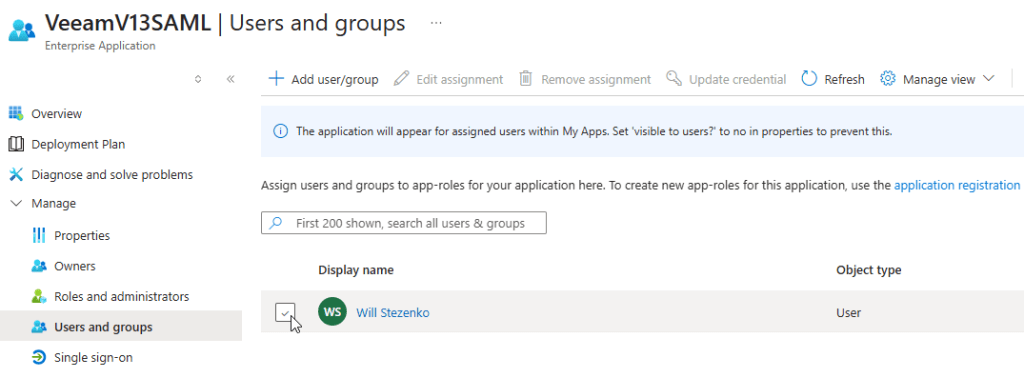
Step 2 – Assign Users to the Single Sign On Application
- Within the application overview , select 1. Assign users and groups
- Select the option to + Add user/group
- Add all users or groups from Entra ID which require access to use this SAML authentication app (E.g access the Veeam server)
- From the sidebar , Select Single sign-on from the the Manage menu on the left
Step 3 – Exchange the XML metadata from VBR
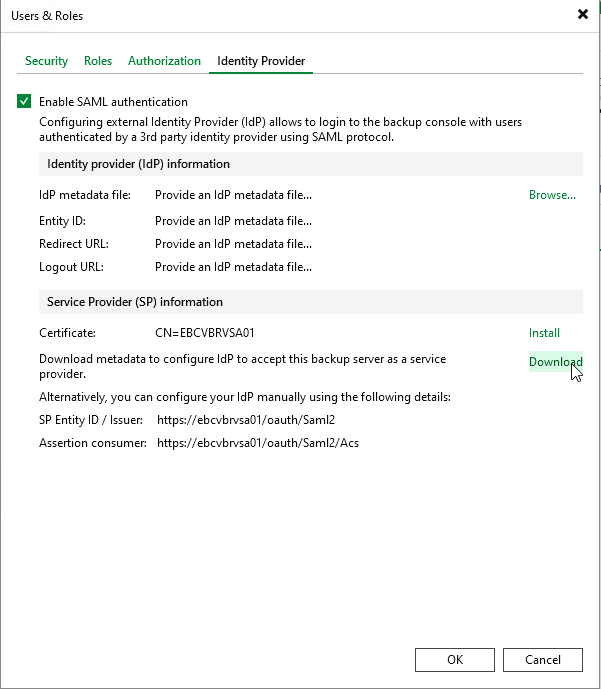
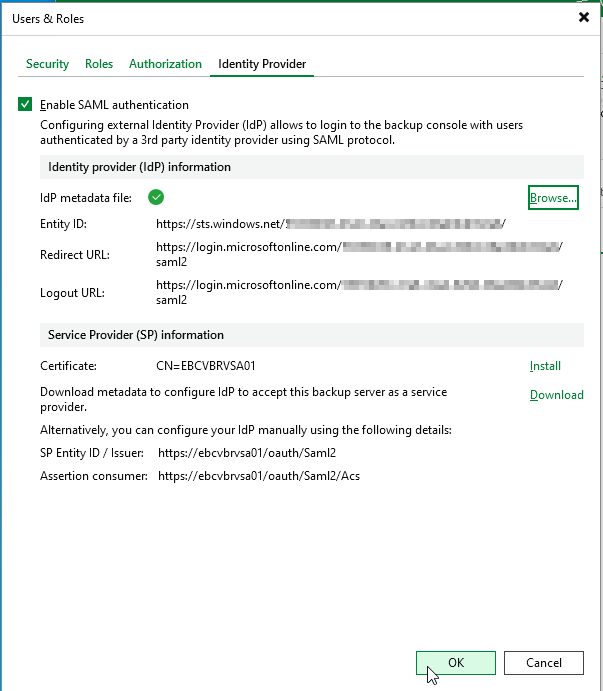
- Open the Veeam Backup & Replication console and select Users and Roles from the hamburger menu
- Select the Identity Provider tab and the checkbox for Enable SAML authentication
- Under Service Provider (SP) Information , Click Install for Install a valid server certificate, and navigate through the Certificate Wizard to select a certificate which is valid for the the backup server, cluster or both.
- If this is a single install, you can use the self-signed default certificate in the Certificate store which is generated during installation if required.
- Click the option to Download for Download metadata to configure IdP and select a location where the XML file will be saved to and click OK
- In this folder, you will find an xml metadata file called veeam_saml2_SP_metadata
- Switch back to the Entra ID application, at the top of Set up Single Sign-On with SAML page, select Upload metadata file, select the veeam_saml2_SP_metadata.xml file and click Add
- Click Save in the Basic SAML Configuration page then click X to close.
Step 4 – Configure Attributes & Claims
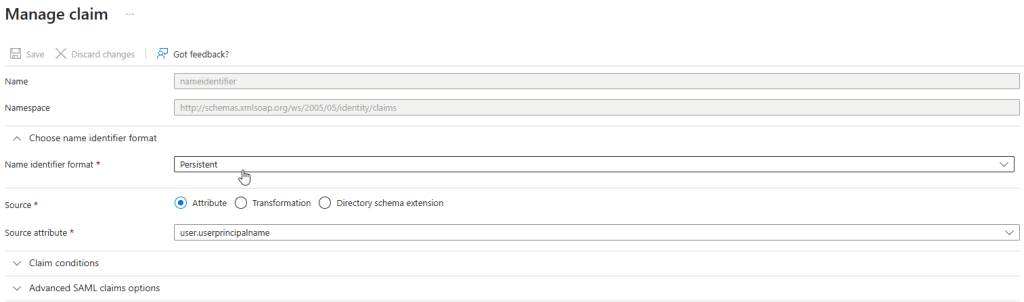
- In the Entra ID application, Select Edit under 2. Attributes & Claims
- Click Name identifier format under the Choose name identifier format, select Persistent from the dropdown menu and click Save.
- In the Attributes & Claims screen, Click + Add a group claim
- In the Group Claims window, select Groups assigned to the application.
- In the Source attribute dropdown menu, select Cloud-only group display names
- Under Advanced options:
- Select the Customize the name of the group claim check box & specify Group in the Name field.
- Specify http://schemas.xmlsoap.org/claims in the Namespace field.
- Click Save.
Step 6 – Exchange the XML metadata & configure SAML
- At the Setup Single Sign-On with SAML screen, scroll down to section 3, SAML Certificates and click download for the Federation Metadata XML
- Switch back to the Veeam Backup & Replication console, click Browse to upload the EntraID meta data file.
- Select the Federation Metadata XML file which you downloaded in the previous step
- In the Users & Roles screen, click Add & select External user or group because this user will be from an external identity source.
- Select the drop down & select User or Group
- In the Name field, enter the full account details of the SSO user or group (E.g admin@your365domain.com or admingroup@your365domain.com)
- Select the role you wish to assign them and click OK

CONGRATULATIONS, you just configured Veeam to use SAML Authentication with your EntraID tenant.
